Newborn Fitted Diaper Tutorial
If you are interested in making cloth diapers, our newborn fitted diaper tutorial will help you get started. We've got lots of photos, plus information on patterns and fabric choices!
The Tutorial
This tutorial shows you how to sew a turned and top-stitched newborn diaper using the $1 pattern available from Rocket Bottoms. Please note that this pattern doesn't provide sewing instructions or fabric recommendations, but many patterns available for a charge do.
No matter which pattern you prefer to use, the basics of this tutorial will apply to most turned and top-stitched diaper patterns.
Materials Needed to Make a Newborn Diaper:
- Lastin or other high-quality elastic
- Cotton sherpa or other absorbent diaper lining
- Zorb or other absorbent hidden layer
- Outer fabric (PUL for waterproof AIO, knit cotton for fitted diaper)
- KAM Snaps
- Snap press or pliers and optional awl for marking snaps
- Coordinating polyester thread
- Sewing machine
- Newborn diaper pattern (I used Rocket Bottoms' $1 pattern)
Many newborn diapers purchased new can cost $15 and up, but with some basic sewing equipment and high quality fabrics, you can sew your own for a few dollars a piece!
Instructions to Make a Newborn Diaper
Pre-wash and dry fabrics if pre-washing when this step is suggested by the fabric manufacturer. Wazoodle provides care instructions for all of their fabrics.
Cutting the Fabric
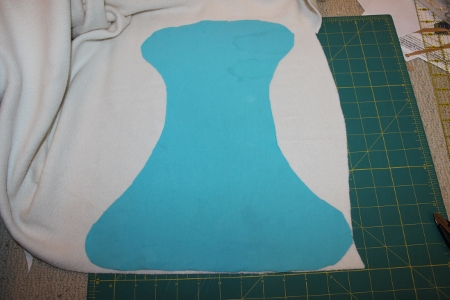
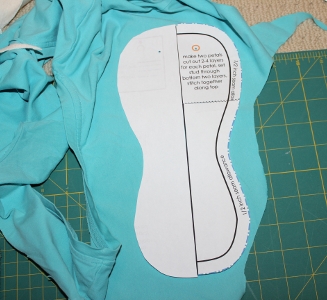
I traced the pattern onto and then cut out my diaper outer. Because printer paper is heavy, it is hard to pin and cut around, so I try to avoid repeating this step multiple times. Instead, I use my diaper outer as the pattern for the remaining layers.
For the outer, you can use PUL for an all-in-one waterproof diaper. I opted to make a fitted diaper and used a knit outer. This fitted diaper will need a diaper cover to be water-proof. You can purchase cotton knit material for your outer, but in this case I used a cotton t-shirt that had a stain on it but was otherwise almost new.
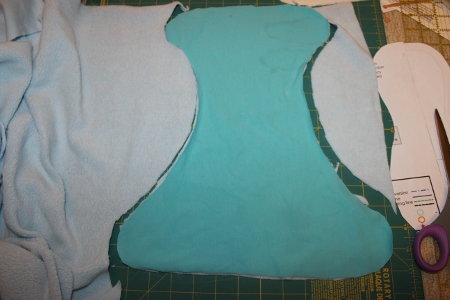
Cut one diaper body layer from sherpa...
...and one diaper body layer from Zorb. In this diaper, the main diaper body will be constructed of 3 layers: one layer of knit on the outer, one layer of super-absorbent Zorb as a hidden inner layer, and one layer of soft, luxurious cotton sherpa which will be immediately next to baby's skin.
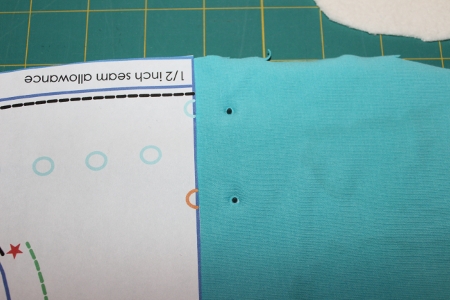
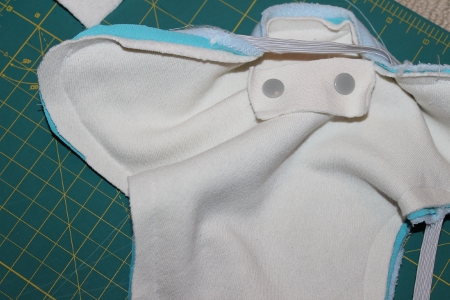
The next step is to place the snaps across the front of the waistband. These snaps will go through only 2 layers of fabric - the outer and the Zorb. Then, the insides of the snaps will be hidden beneath the layer of sherpa so they don't rub against your baby's sensitive tummy.
I like to place the umbilical cord snap-down snaps in place first. These are optional, but if you plan to start using cloth diapers before your little one loses their cord, they will be important! Below, you can see the caps in place for the umbilical snap-down. I like to use Size 20 KAM snaps throughout my entire diaper. For an introduction to snaps, check out the Beginner's Guide on KAM Snaps website.
Below, I have placed the socket on the top cap and the stud on the bottom cap.
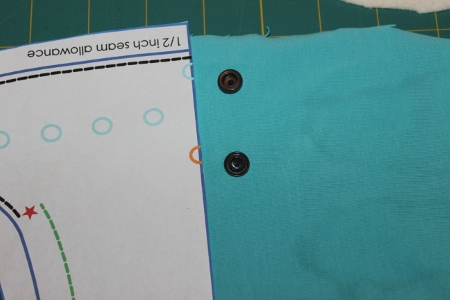
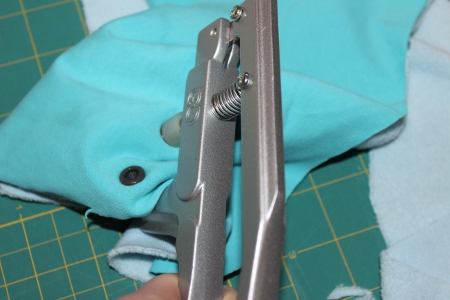
The next step is to squeeze the snaps to lock the caps into the stud and socket. I would love to own a snap press, but since I don't plan to sew a lot of diapers, I started out with KAM's snap pliers.
The snap pliers are quick and easy to use. You simply place the assembled cap/socket (or cap/stud) into the pliers and squeeze down. You do need to apply a fair bit of pressure to the pliers in order to compress the tip of the cap in around the socket to "lock" it in place. Snaps always set better if they go through a couple of layers of fabric (in this case the knit plus the Zorb).
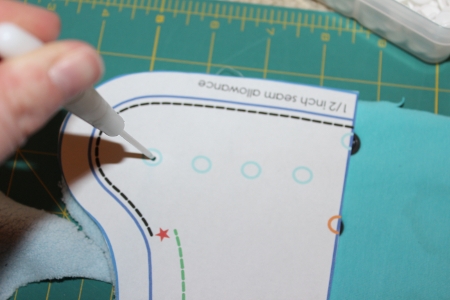
After I set the umbilical snaps, I use my KAM Snaps awl to mark the locations of the remaining waist snaps. I actually poke right through the pattern and all of the layers of fabric. The awl makes it easier to push the snaps through multiple layers of fabric and helps get more precise positioning of the snaps too.
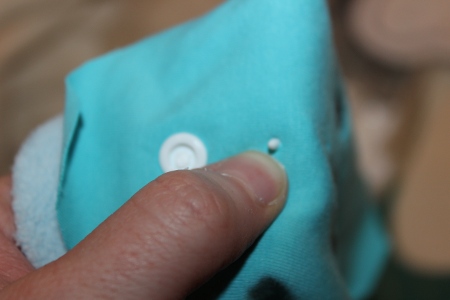
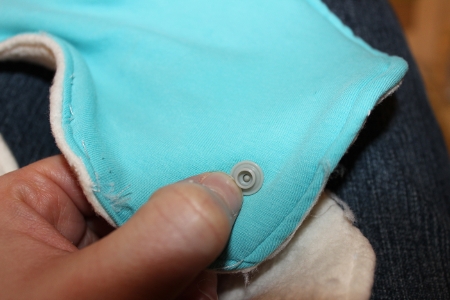
You can see one of the set snaps up close, as well as the positioned cap, ready to place a socket on. I always use sockets on the waist band (just like all of the big brands) and use the studs on the tabs.
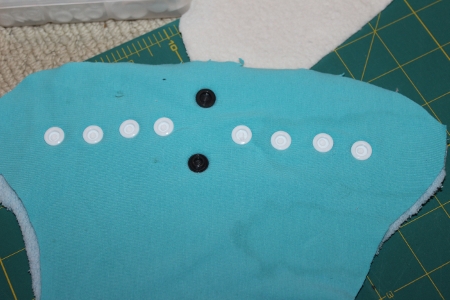
As you can see below, I now have all of the snaps in place. The grey are for the umbilical snap-down, while the white are waist band snaps.
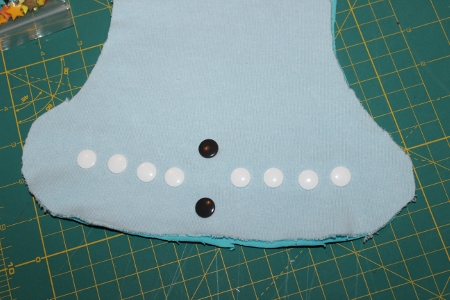
Here is a front view...
I like to make diapers with snap-in soakers. You can always sew your soaker as added layers within the core of the diaper (in between the sherpa and the zorb) but I find that these types of diapers take forever to dry. Snap-in soakers dry much faster, and allow you to customize how much absorbency you need depending on whether you're using the diaper overnight or during the day.
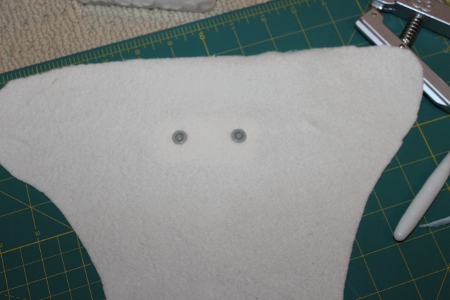
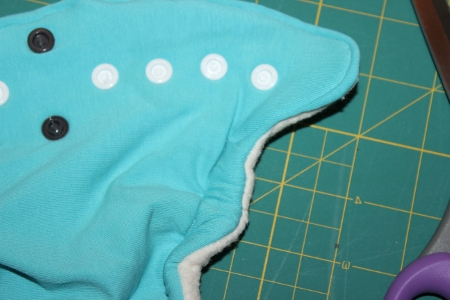
The image below shows sockets placed in the back of the diaper. These sockets are set into the sherpa layer only. I added a small piece of fabric behind the Sherpa layer (you can see a slight outline below the snaps). This small piece of fabric will help strengthen the diaper so the snaps don't pull through the single layer over time. This is obviously an optional step, but I like to do it.
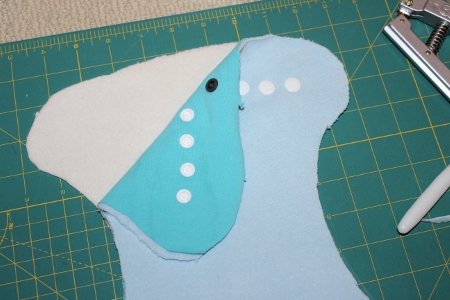
The next step is to place the fabrics right-sides together. In this diaper, the outside layer of the knit is placed against the fuzzy side of the sherpa, as shown below.
After this, I sew the elastic in place. I stitch the ends of the elastic to the spots marked on the diaper, keeping my stitching in the outside half-inch of the diaper. Because this diaper pattern uses a 1/2" seam allowance, this means that when I turn the diaper, the stitches won't affect my turning.
Next I stitch the diaper leaving a 1/2" seam allowance. I leave a small opening at the back of the diaper so that I can turn it right-sides out. I like to trim my seam allowance off the edges before I turn it to reduce bulk. I usually trim back to about 1/4".
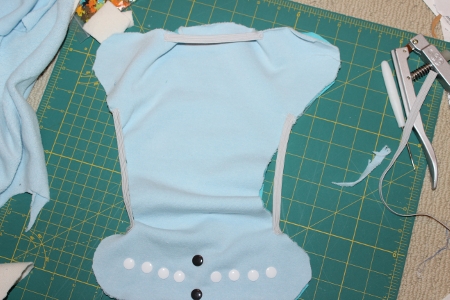
Once the diaper is turned, I top-stitch around the diaper, sewing a scant 1/4" from the edges, except around the leg casings, where I sew further in to avoid stitching through the elastics.
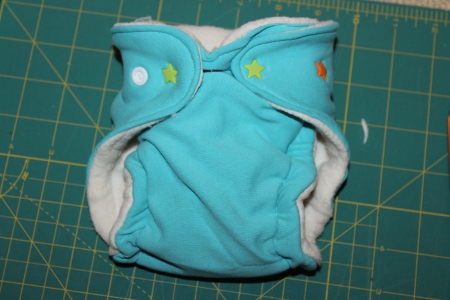
The final step in the diaper body is to add snaps to the wings of the diaper. I used some adorable star snaps from KAM Snaps... they also sell hearts and engraved snaps with imprints of monsters, animals and other cute images, so you can do all sorts of neat things to customize your diapers! I purchased a variety of colors of stars in one pack, which was a nice way to mix my diapers up a bit.
The snaps have a stud on the sherpa side and the cap on the outside of the tab.
The next step is to cut out the soaker. I cut out one in a coordinating color to the diaper, which makes it easy to match my soakers to my diapers when I do laundry later.
I also cut out one layer of Zorb and one layer of sherpa. Then I sew all 3 layers together, similar to the diaper construction, and turn and top-stitch. The sherpa will be the "top" layer that sits closest to baby's bum.
I like to add snaps to keep my soaker in place as I put the diaper onto my baby. Here you can see that you will use studs on the soaker (remember, we added the matching socket snaps into the body of the diaper).
For this diaper, I sewed a second soaker out of 2 layers of cotton sherpa and one layer of zorb. You can sew your two soakers together into a "petal" style, meaning they are stitched at one end, but I opted to leave them separate since I may not need all of the absorbency of this diaper during the day.
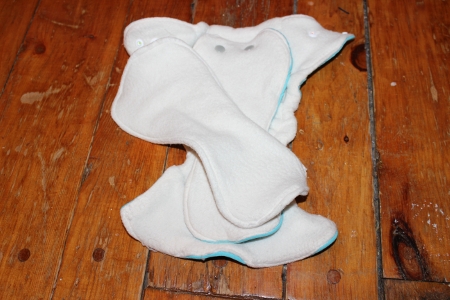
Below you can see the finished product (in front), as well as a second diaper in the back.

The second diaper was sewn with white cotton t-shirts rather than diaper fabrics. The t-shirts are absorbent. This diaper uses 5 layers of cotton t-shirts in the body, and two soakers with 4 and 5 layers of t-shirt material. It is also very absorbent, although not as soft or cute as the sherpa.
When I first started out making diapers, I practiced with old t-shirts. I still test out new patterns using t-shirts, since they are an inexpensive fabric to practice with. I plan to donate some of my test diapers to cloth diaper charities to help families who cannot afford to get started with cloth diapers.
Do you plan to make your own diapers?
Let me know below! If you try out this tutorial, I would love it if you would post photos of your diapers on our Facebook page!
Sponsor Love

You may also like:
Cloth Diaper Patterns
Making your own cloth diapers can save you money and you're guaranteed
to get a diaper that fits your baby perfectly! This article includes
links to a number of cloth diaper patterns that are available free or
for purchase on the internet.
For information on cloth diaper fabric and pattern suggestions, go back to Making Cloth Diapers.
At Thinking About Cloth Diapers, we offer reliable, up-to-date cloth
diaper research to save you time so you can get on with the other things
you want to do.
Return to Thinking About Cloth Diapers homepage.
Sponsor Love


Cloth diapers don’t have to be hard, but with so much information available, they can seem overwhelming! My name is Jenn, and I'm also the mom behind the site All About Cloth Diapers. I hope this site helps you easily find the information you need to start using (and keep using) cloth diapers! [More]
