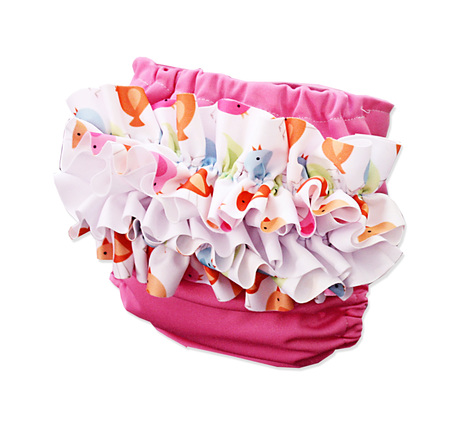
Create Adorable Cloth Diaper Ruffles
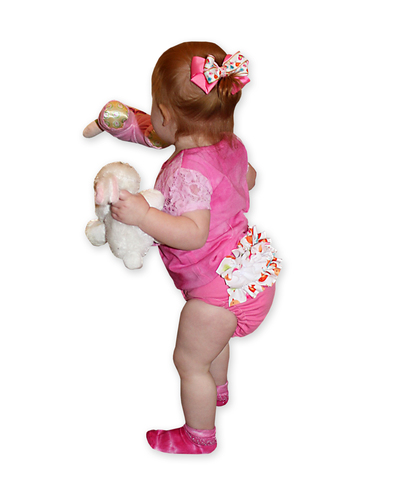
...plus a Matching Shirt & Sock Set

One of the most sought after girly cloth diaper customizations are cloth diaper ruffles! Now you can learn how to make your own.
This tutorial explains what is used to create the outfit in the photos. But you can mix and match whatever fabrics you want to make your own. Be creative!
First up...Let's make the cloth diaper ruffles!
Supplies Needed:
- Babyville Boutique® PUL for Diaper Outer – Pink 21” x 24”
- Babyville Boutique PUL for Ruffle Strips (for size medium) – 2 ½” x 24” of White and Little Birds Print
- Babyville Boutique EZ Adjust Tape – White, 1 Pkg.
- Babyville Boutique Stay-Dri Wicking Fabric, White, 2/3 Yard
- Babyville Boutique Pre Made Soaker
- Babyville Boutique Diaper Pattern (or other diaper pattern)
- Dritz® Braided Elastic – ¼”, 2/3 Yard (leg and back pocket elastic)
- Dritz Mark B Gone™ Marking Pen
- Omnigrid® Rotary Cutter and Mat
- Omnigrid Ruler
- Basic Sewing Supplies
Instructions:
1. Trace then cut PUL diaper outer and a front reinforcement panel for the tummy loop area. Glue the reinforcement panel, laminate sides together, to the diaper outer.
2. Cut a Stay-Dri Wicking inner lining.
3. Glue or tape the loop tape onto the front panel. Stitch loop in place using a straight or zig-zag stitch.
4. At diaper back, measure down 2 ½” and draw a horizontal line across back of diaper. Repeat to draw two more lines below the first, spaced 5/8” apart.
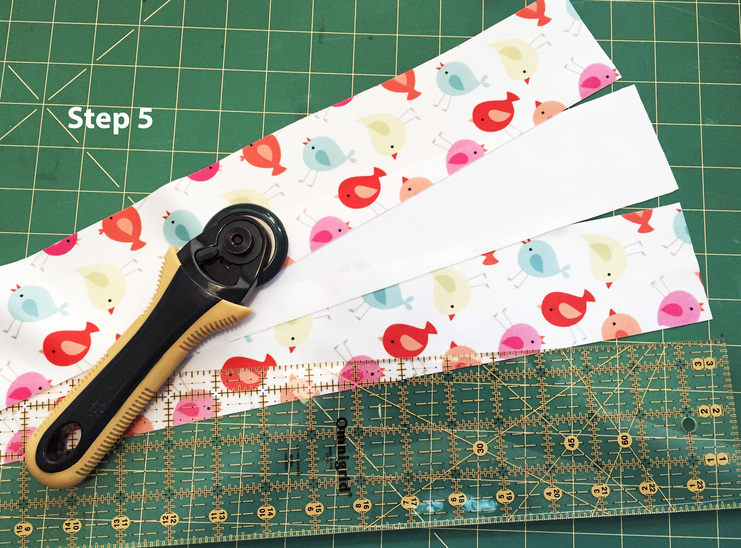
5. Cut PUL Strips for ruffle (see supply list for strip size).
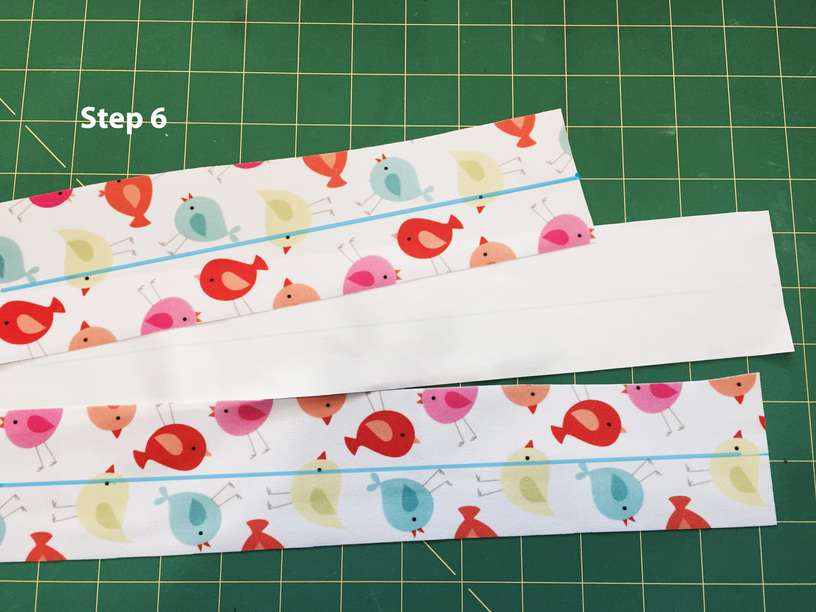
6. Draw
a line down the middle length of each PUL strip.
7. Using a basting stitch, stitch down strip 1/8” from line. Repeat stitching 1/8” away from other side of line. Tie off basting stitches on one end of the PUL strip.
8. At other end of strip, carefully pull both top threads to gather the strip. Work slowly and carefully adjusting gathers evenly to length desired for back ruffle.
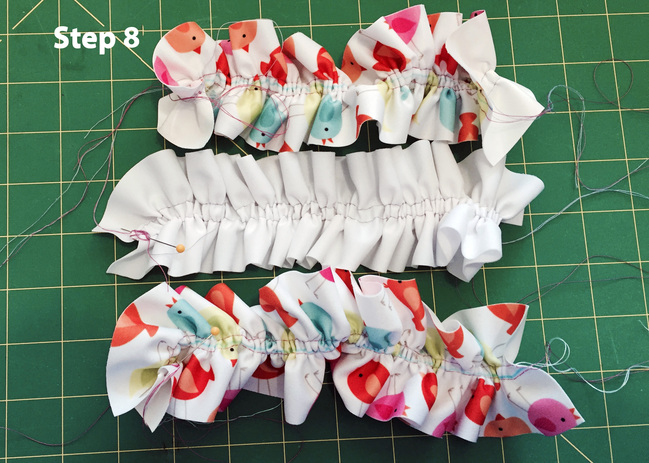
9. Repeat Step 6-8 to gather the remaining two strips.
10. Stitch the white middle strip first. Pin the white strip along the middle marked line on the diaper back. Stitch the strip to the diaper using a regular stitch length.
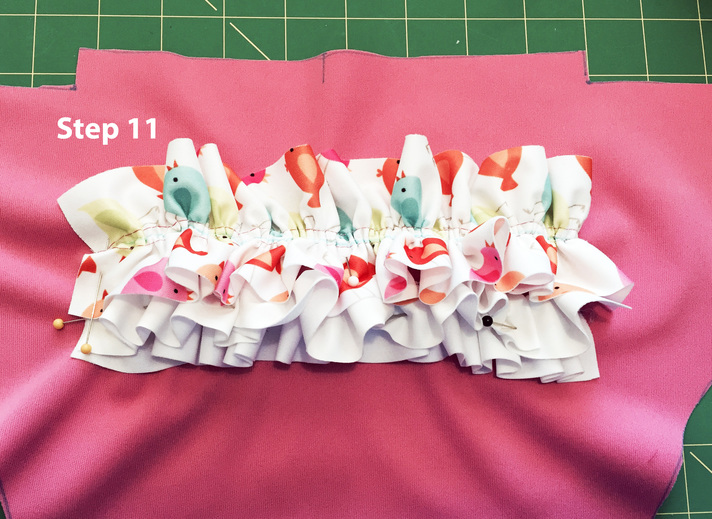
11. Pin the lower side of the white ruffle up. Pin another ruffle in place along the bottom line; stitch. Pin top of middle ruffle down, then pin top ruffle in place on marked line, stitch.
12. Remove pins, then remove basting stitches from ruffles (note: a stitch ripper is helpful here).
13. Pin edges of ruffles away from diaper seam line so they won’t get caught in the diaper seam. Complete the diaper using instructions for a pocket diaper or a cloth diaper cover.
Additional tips...Run diaper through dryer for 20 minutes on high heat to seal stitching holes before using. If your baby is an especially heavy wetter, you may want to apply a partial PUL reinforcement panel to cover the back stitching area before constructing the diaper or use diaper Seam Sealing Tape over the stitched area to further seal the stitching holes.
Want to make the rest of the matching outfit?
Let's go!
Materials Needed for Tie-Dye Shirt and Socks:
- Babyville Boutique® Applique – Bird and Flowers
- White Cotton T-Shirt (ours had lace)
- White Cotton Socks
- Dylon® Dye – Flamingo Pink
- Rubber Bands
- Stainless Steel Bowl
- Salt
- Rubber Gloves (to protect hands from dye)
Instructions:
1. To create tie-dye pattern, gather a place on shirt into a bundle and secure with wrapped rubber bands. You can create circle patterns, stripes or other patterns depending on how you gather and apply bands.
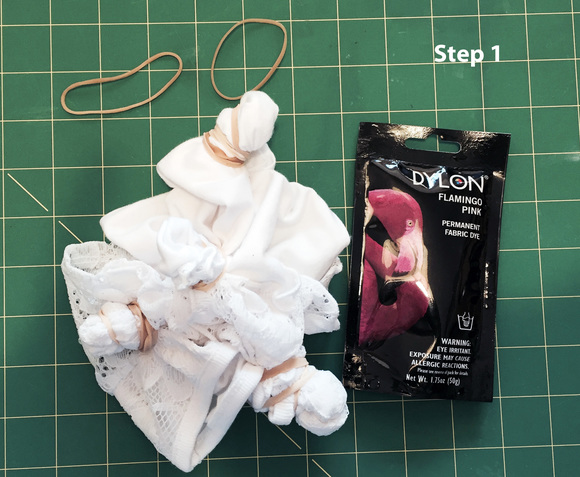
2. Gather places on the socks and rubber band tightly.
3. Follow manufacturer’s instructions for Dylon Dye, mixing and adding salt.
4. Immerse the shirt and socks into the dye mixture. When color desired is reached, remove items from dye and rinse well in cold water. Dry shirt and socks.
5. Note: For first washes, it is advisable to wash dyed items separately until excess dye washes out.
6. After shirt is dry, iron the bird applique to the front of the shirt.
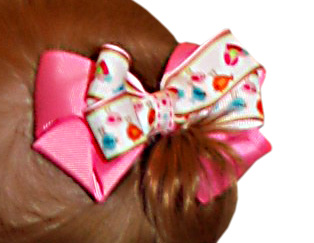
Finally...The Bow!
Supplies Needed:
- Babyville Boutique® Ribbon – Little Birds
- Pre-made Clip on Pink Bow
- Heavy Duty Thread
- Glue Gun
Instructions
1. Make a 4 loop bow from the 7/8” ribbon to sit on top of the existing bow. Tie center of 4 loop bow.
2. Remove narrow wrap ribbon from center of purchased bow. Glue Little Birds bow on top.
3. Spread hair clip. Wrap the 3/8” Little Birds ribbon around the bow center and glue.
4. Note: You can also make a bow from scratch using the Babyville ribbon and your favorite bow making technique.
Sponsor Love

Sponsor Love


Cloth diapers don’t have to be hard, but with so much information available, they can seem overwhelming! My name is Jenn, and I'm also the mom behind the site All About Cloth Diapers. I hope this site helps you easily find the information you need to start using (and keep using) cloth diapers! [More]
