Serged Newborn Diaper Tutorial
Our serged newborn diaper tutorial will help you make cloth diapers using your serger. We've got lots of photos, plus information on patterns and fabric choices!

The Tutorial
This tutorial shows you how to sew a serged newborn diaper using the free pattern available from Rocket Bottoms. Please note that this pattern doesn't provide sewing instructions or fabric recommendations, but many patterns available for a charge do.
This tutorial shows a fitted diaper made with knits from old t-shirts, but you could also follow it to make an all-in-one with a PUL outer, or to make fitteds from commercially-available knit fabrics. No matter which pattern you prefer to use, the basics of this serged newborn diaper tutorial will apply to most serged diaper patterns.
Materials Needed to Make a Newborn Fitted Diaper:
- Lastin or other high-quality elastic
- 2 large or X-Large men's t-shirts (or similar amount of knit fabric) - used t-shirts are preferable and can be picked up cheaply from thrift stores
- KAM Snaps
- Snap press or pliers and optional awl for marking snaps
- Coordinating polyester thread
- Sewing machine
- Serger
- Newborn diaper pattern (I used Rocket Bottoms' free pattern)
If you purchase newborn fitted diapers new, they can cost $15 or more - but following this serged newborn diaper tutorial, you can sew your own from t-shirts and other knit materials for only a few dollars apiece!
Instructions to Make a Newborn Diaper
Cutting the Fabric
The body of the diaper will be made up of 4 layers of knit fabric. To accomplish this, I laid 2 t-shirts on top of each other, and then traced the pattern onto the top layer. I then roughly cut around, leaving about 1/2" of fabric outside of the sewing line (which the serger will trim off when stitching).
Additionally, this diaper will have 2 4-layer petal-style soakers, stitched together, with a single snap to attach to the diaper. Trace 2 of the soaker patterns onto the t-shirts (all 4 layers again), and cut out roughly, leaving about 1/2" of fabric outside of the sewing line.
The image below shows a men's Large t-shirt with the pattern traced out.
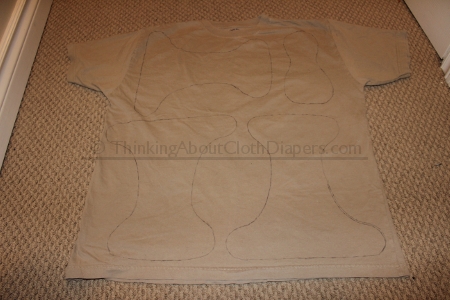
I've found it's best to run the pattern the same direction as the knit (i.e., like the 2 bodies of the diapers at the bottom of the t-shirt), rather than like the one that lays horizontal (like the one at the top) - this allows for better stretchiness in the diaper. You can cut 2 full diapers from 2 t-shirts if you lay 4 soaker patterns vertically across the top of the shirt near the neckline, and 2 bodies at the bottom.
Please note:
This fitted diaper will need a diaper cover to be water-proof. While this tutorial demonstrates knit materials which will make a fitted diaper, you can also add a PUL outer to make a waterproof all-in-one.
Tip! To keep your fabric layers from shifting around, I find it easiest to pin the 4 layers of fabric together before I cut the fabric.
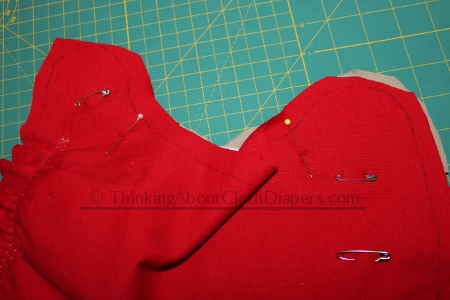
Elastic Placement
The next step is to add the back elastic to the diaper. I use straight pins to hold the ends of the elastic in place. I do not recommend using cheap elastic - in the end the difference between inexpensive Wal-Mart elastic and that purchased from a diaper making supplier is only nickels and dimes per diaper... I prefer to use Lastin elastic, because it is soft and very durable, and it is very hard to change stitched elastics in serged diapers! Each type of elastic has a different stretch to it so the length you will need will depend on the type of elastic you choose.
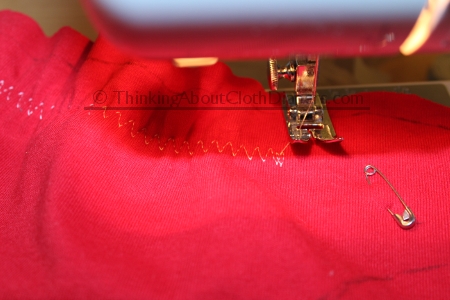
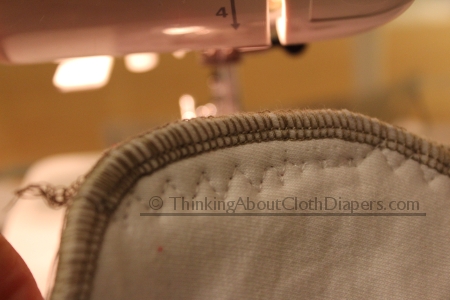
This step is completed using a wide or multi-stitch zig-zag on your sewing machine, back-stitching at the start and stop to lock the threads. Be sure to keep the stitching in at least an inch from the trim line on the diaper so that your elastic doesn't get caught by the serger needles or knife later!
Next, we stitch the leg elastics in the same way.
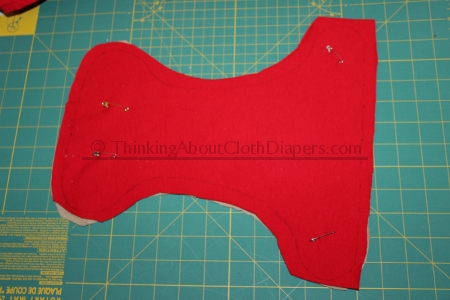
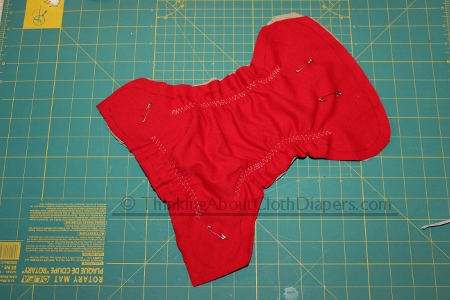
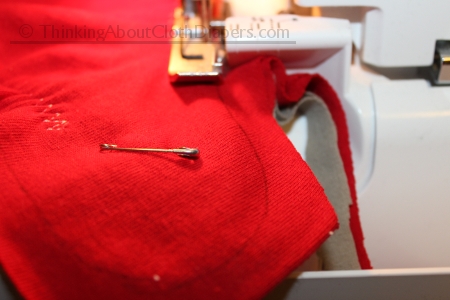
Here is a picture of the diaper with all of the elastic stitched in place. We will now be moving the remaining work over to the serger!
Adding the Belly Snaps
Before we actually start serging, it is important to place the belly snaps. While some fitted diaper makers place the snaps through all of the layers of material, for newborn diapers I prefer to put them only through the outer 2 layers so that the back of the snaps do not rub against baby's sensitive tummy.
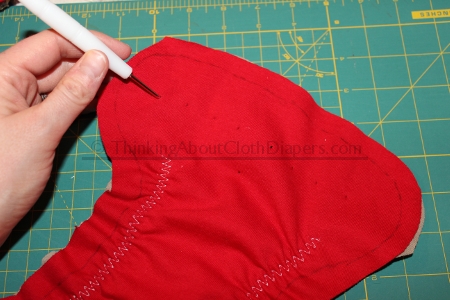
Using your diaper pattern as a guide, poke holes through the outer 2 layers of the diaper fabric using an awl (optional). If your newborn diaper pattern has an umbilical snapdown, you'll also want to add the bottom snap at the same time. I like to place the umbilical cord snap-down snaps in place first. If you plan to start using cloth diapers before your little one loses their cord, this snap will be important!
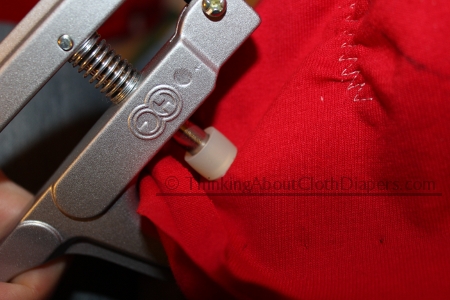
Because I don't make a lot of diapers, I've purchased an inexpensive pair of snap pliers, rather than a snap press. I like to use Size 20 KAM snaps throughout my entire diaper. For an introduction to snaps, check out the Beginner's Guide on KAM Snaps website.
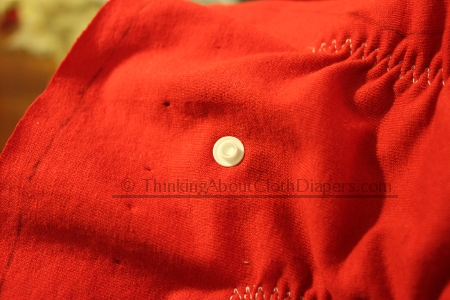
The image below shows the snap stud in place for the umbilical snap-down. Please note: We will NOT be adding the upper socket snap for the umbilical cord snap-down until the diaper is almost complete - the reason why is because if we added it now, it would be in the way of the serger stitches!
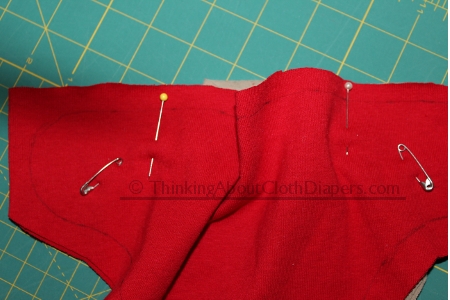
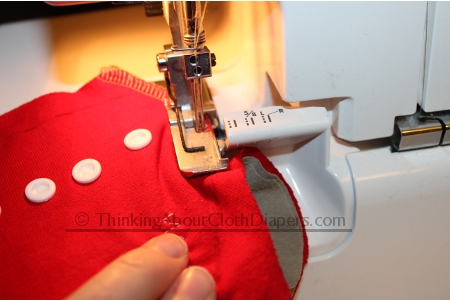
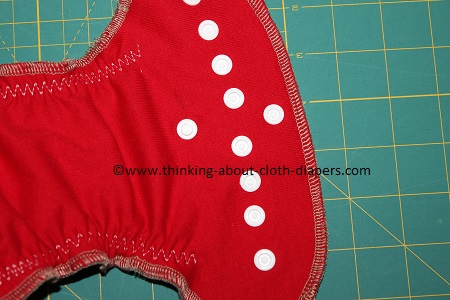
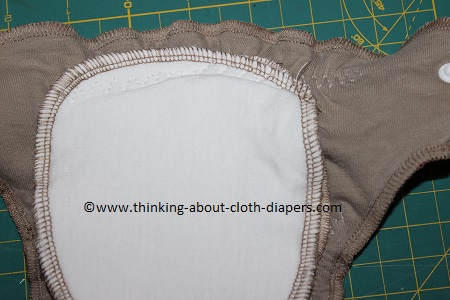
Below, I've completed snapping in the socket snaps across the belly band. Note how they only go through the first 2 layers (red) and not through the bottom 2 layers (tan).
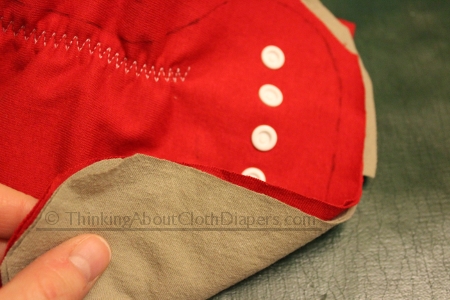
The snaps are all in place.
Serging the Diaper
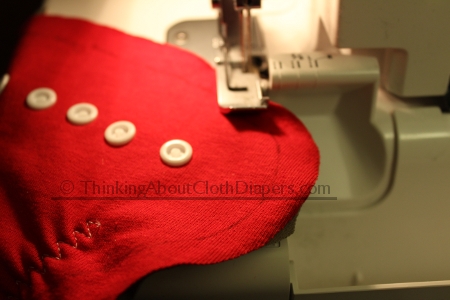
Now, we begin to serge around the diaper. You can use either a matching or a contrasting set of threads in your serger, or experiment with different colours of thread in the loopers than the needles. Variegated thread also adds a neat effect, especially for diapers made from old white t-shirts!
You will now be lining the serger knife up with the line you drew, and the knife will trim off the rough edges as you sew. I use a 4-thread configuration with the widest stitches I can. For stitch length, I prefer a bit longer - between a 3 and a 4 - but you can experiment to see what you like.
If you aren't good at serging around corners, you'll want to practice before you start your diaper (or plan to make a few extra less-than-perfect diapers!) The tight curves on diapers take some practice to feed evenly through the serger - I find that it's good to remember to move the fabric in front of the knife, rather than pulling the fabric away from the back where the stitching is happening.
If you've kept your safety pins back far enough from the stitching lines, you can take them out when you're finished serging, but I feel better removing them just before I get to them!
When you reach the end of the diaper, serge to the edge as shown below and then trim any excess thread.
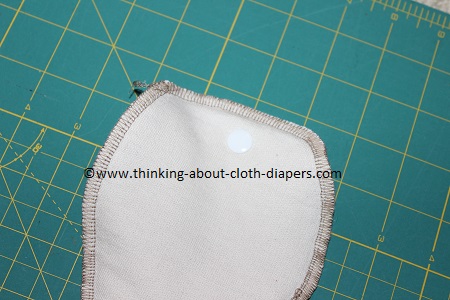
The next step is to place the upper umbilical snap-down socket through all 4 layers of fabric, as shown below.
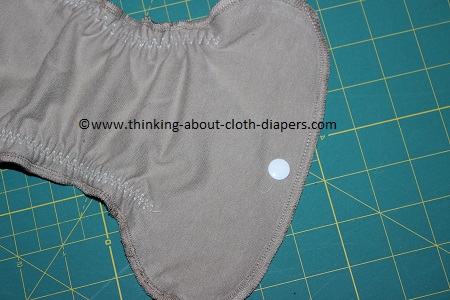
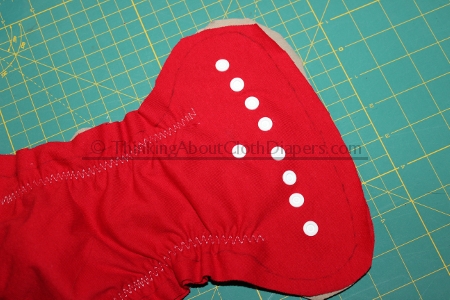
Here is the completed front belly band.
Adding the Soakers
Next, I add another snap at the back of the diaper, placing this socket so it goes through all 4 layers of fabric. I chose to use a decorative star post here, but you can use any snap you wish! This snap will be used to hold the snap-in soaker in place, which will improve washing of your diaper (less layers stitched together means less holding in stink!) and speed up drying times substantially!

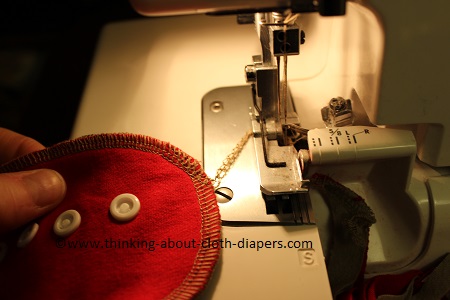
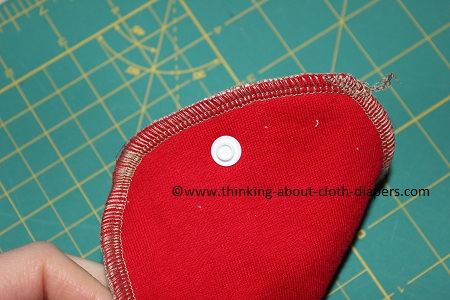
Serge around 4 layers of soaker fabric at a time, so that you have 2 soakers. Next, place a stud snap through all 4 layers of fabric on one soaker, so that it will snap into the diaper. This soaker will go on the bottom, closest to the diaper outer.
The photo below shows the snap in place. The red will go up against the inner layer of this diaper.
Stack the 2 petal-style soakers together.
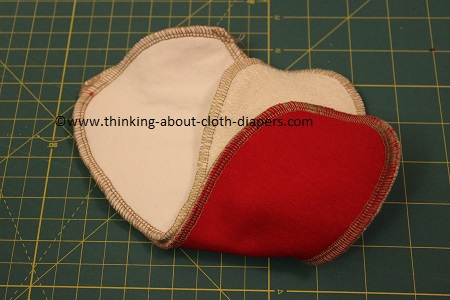
Using a wide or multi-stitch zig-zag on your sewing machine, stitch the 2 soakers together at the back, avoiding the snap so you don't break any needles! (I've done this more than once!)
Now you can snap your soakers into your diaper outer.
The final step is to add the wing snaps to the diaper. Using an awl, poke through all 4 layers of fabric as marked on your diaper pattern. The wing snaps use stud snaps.
That concludes this serged newborn diaper tutorial!
The Finished Diaper
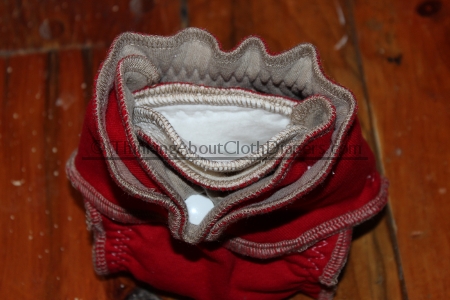
Here's a photo of the diaper from the top, showing the soakers snapped in. This diaper contains 12 layers of absorbent cotton knit, which is usually more than enough for a newborn!
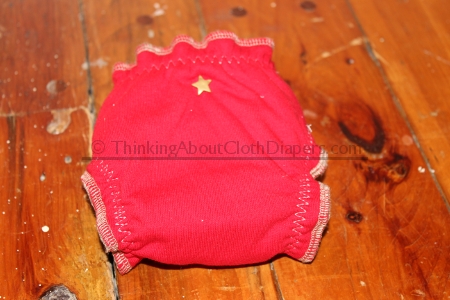
Here's an image of the diaper from the back.
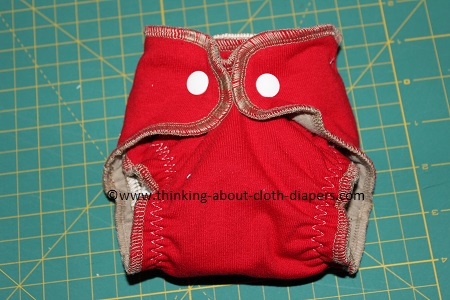
And here's the finished diaper from the front! Isn't it cute? And oh-so-tiny!

Following this serged newborn diaper tutorial, I've now made almost 2 dozen of these newborn diapers, and am keeping a few for my own use, but I also plan to donate several to cloth diaper charities to help families who cannot afford to get started with cloth diapers!
Charity Challenge! If you're looking for ways to get involved in the cloth diaper community, I would love if you would also consider donating your time and materials to sew a couple of diapers for a charity near you too! Most cloth diaper banks desperately need newborn cloth diapers, since many one-size versions don't fit until babies are at least 10 lbs. Please drop me a note on Facebook to let me know if this serged newborn diaper tutorial inspires you to donate a few diapers to a charity!

For instructions on how to make a turned and top-stitched diaper using a sewing machine, check out our tutorial here.
Do you plan to make your own diapers?
Let me know below! If you try out this tutorial, I would love it if you would post photos of your diapers on our Facebook page!
Sponsor Love

For information on cloth diaper fabric and pattern suggestions, go back to Making Cloth Diapers.
At Thinking About Cloth Diapers, we offer reliable, up-to-date cloth
diaper research to save you time so you can get on with the other things
you want to do.
Return to Thinking About Cloth Diapers homepage.
Sponsor Love


Cloth diapers don’t have to be hard, but with so much information available, they can seem overwhelming! My name is Jenn, and I'm also the mom behind the site All About Cloth Diapers. I hope this site helps you easily find the information you need to start using (and keep using) cloth diapers! [More]
